Jan 26, 2016 | Cuisine, Soups |
Well. Last post was a summer post about ice cream. And today we have a winter post about soup. I guess it is stating the obvious to say it’s been a while since my last post.

So warming and yummy on a cold day.
I’m not going to waste our time with some long explanation and apology, Dear Reader. Life happens, as you know. Suffice to say, I hope to get back into the swing of things and post more regularly, so bear with me.
Now. Let’s talk pumpkin.

Not just for Halloween!
This fall, I had an overabundance of little pumpkins hanging around the house, discarded after a Halloween celebration. I was determined not to let them go to waste. I was going to roast them up and turn them into something delicious.
I failed. They rotted. It was gross.
So when I paid a recent visit to Radish & Rye at the Broad Street Market, my local farmer’s market, and saw some baby pam pumpkins sitting there looking cute, I couldn’t help myself. I grabbed a few, along with an apple, some shallots and some peanut butter and set to soup making.

Yes, it is possible to get yummy local produce in winter!
Because I got the ingredients from Radish & Rye, I know that they are locally produced and in the case of the veggies — sustainably grown. Radish & Rye Food Hub is a food stand that exclusively sells produce and products that are grown or made by local, small-scale family farmers and producers. Most of their produce is grown using organic farming methods. In the case of my pumpkins, they were sourced from the local organic Aaron Kanagy Farm in Mifflintown.
Radish & Rye carries great locally produced canned and dry goods. You can always count on Zimmerman Peanut Butter, a delicious local butter that I’ll likely dedicate a whole post to. They also carry local favorite Torchbearer Sauces, my favorite pickles in the world — Ep!c Pickles, coffee from Little Amps and more.
I never visit the Market without a stop at Radish & Rye. We get all our milk and other dairy from the Hub, sourced from Apple Valley Creamery. I also pick up my Piney Mountain Orchard vegetable CSA there, even in winter now that Megan added a winter share. Proprietors Dusty & Julie James are both incredibly nice and know their products really well. I often talk to them about how best to use their seasonal veggies.

Let the pumpkins cool a few moments before you try to skin them.
I’d made curry soup with winter squash and root vegetables before with success, so I figured a curry-seasoned soup with pumpkin would turn out well. I wanted to add a little bit of sweetness without overdoing it or needing to add sugar, so that’s where the apple came from. I picked shallots because I wanted a more mild flavor than straight garlic and onion. And honestly, the Zimmerman’s peanut butter was at eye level when I was thinking about the recipe, so into the grocery basket it went.
This recipe could easily be made with canned pumpkin, but to be honest, it isn’t much effort to cut up and roast the whole pumpkin. You simply lop the tops off, quarter the little globes, scoop out the seeds and pop the quarters in the oven for a while. 2-3 little baby pam or sugar pumpkins should be enough for this recipe. I used three and had enough roast pumpkin left over to use in a pasta sauce the next day.

I couldn’t resist adding a little more heat by topping my soup with Sriracha.
A lot about this recipe can be adjusted to suit your taste or what you have on hand. Don’t like peanut butter or have an allergy? Leave it out, the pumpkin and apple will still taste great. Want to make this vegan or vegetarian? Use veggie stock instead of chicken. Like a spicier soup? Add more curry or more cayenne. Want an even creamier texture? Stir in some cream or half and half after blending. You could even substitute other winter squash or root vegetables for some or all of the pumpkin — butternut squash, kabocha squash or sweet potatoes would all work well.
The touches of curry and spice in this filling soup will keep you warm in the cold winter months. Pumpkins aren't just for fall -- you can generally find them into the colder months as well. Adjust the amount of spice to suit your tastes. And if you don't like peanuts or are dealing with allergies, feel free to leave out the peanut butter -- the soup will still be good without it.
Ingredients
- 2-3 small baking pumpkins (baby pam or sugar), enough to get 2 1/2 cups of chopped, skinned pumpkin
- 1 Tbsp garam masala
- 3/4 tsp cumin
- 3/4 tsp tumeric
- 1 dash cayenne (optional)
- 1/2 tsp salt
- 2 Tbsp butter
- 1/c cup diced shallot
- 1 tsp fresh grated ginger
- 1 apple, peeled, cored and diced
- 4 cups chicken or vegetable stock
- 1/4 cup peanut butter (preferably natural peanut butter without added salt)
Instructions
- Preheat your oven to 350 degrees. Line a baking sheet with parchment paper.
- Cut the tops off your pumpkins, then cut them in halves or quarters top to bottom. Scoop out the seeds and strings inside (saving the seeds for another use if you so choose).
- Place pumpkin pieces face down on the parchment-covered baking sheet, and bake for 45-50 minutes, until easily pierced with a fork.
- In a small bowl, mix the garam masala, cumin, tumeric and salt with 2 Tbsp water to make a paste. Set aside.
- Melt the butter in a Dutch oven or large saucepan over medium to medium-high heat.
- Add shallots, sauté about four minutes until they are starting to soften.
- Add ginger and spice paste, sauté another two minutes
- Add the apple, sauté another two minutes
- Add the broth, bring to a simmer.
- Add the peanut butter, stir.
- Simmer, stirring occasionally, for 15-20 minutes.
- Blend soup using an immersion blender or by transferring to a blender (working carefully and in batches if necessary).
- Top with anything from cilantro and a few dashes of Sriracha sauce to roast pepitas and a drizzle of maple syrup.
3.1
http://madefrompa.com/pumpkin-curry-soup/
Jun 7, 2015 | Cuisine, Desserts |
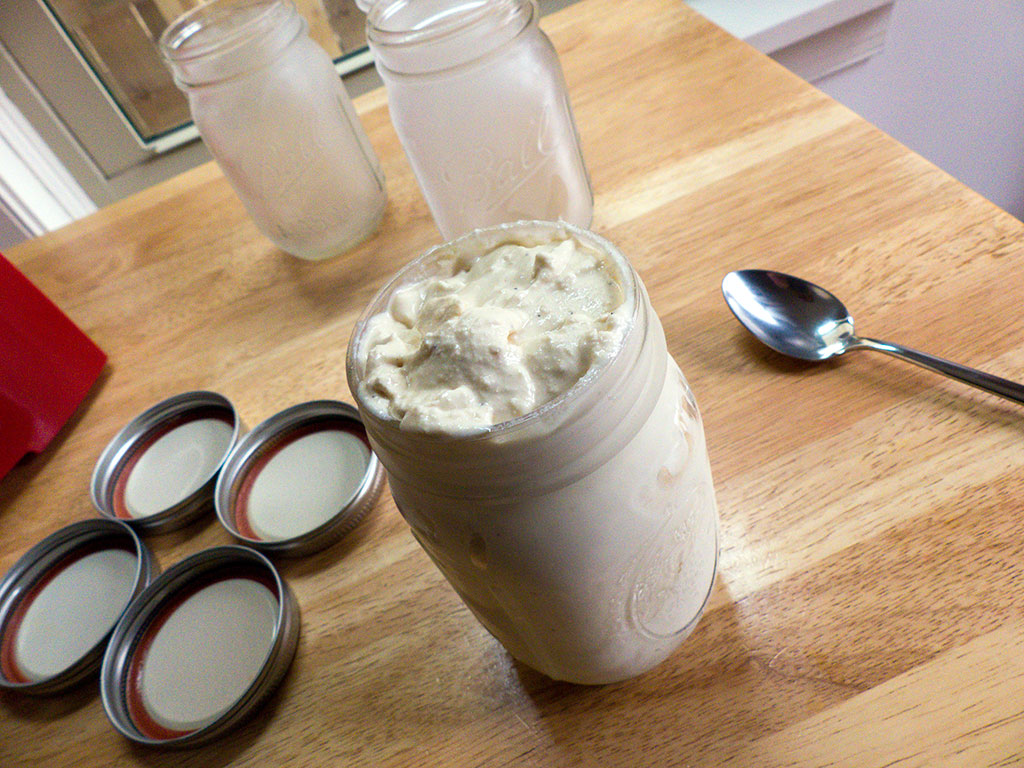
I use Mason jars for ice cream because I am clearly a hipster. Also because they chill nicely and are reusable.
During Harrisburg Beer Week, when I made that incredible milkshake, I promised the recipe for the coffee ice cream that was a key ingredient along with Zeroday Brewing Co.‘s chocolate hazelnut stout. Well, here you go, my Little Amps Coffee Ice Cream. I know the weather in PA right now isn’t necessarily shouting “SUMMER” but you and I both know that the arrival of the oppressive humidity that marks our springs and summers in PA is just around the corner.
The only good thing about the summer temperature is that I have an excuse to get out the ice cream maker and not put it away for months. Expect more recipes for frozen goodness here at the blog as I try to keep cool this summer.

I can never resist sampling soft, almost-done ice cream straight from the churner.
This coffee ice cream is actually my favorite of my ice cream recipes, and one I come back to regularly. I’ve always used Little Amps coffee beans to make it. You could make this using another nice coffee or espresso bean, but I make no claims to how this will turn out with a generic supermarket coffee or even worse — Starbucks beans.

It doesn’t take many ingredients to make a delicious ice cream at home.
Little Amps Coffee is a specialty coffee roaster located here in Harrisburg. Started by Aaron Carlson and his wife, the company sources beans from all over the world and roasts them locally. Initially just a roasting company, Little Amps now has two coffee shop locations in Harrisburg, with another being planned for Philadelphia.
The Little Amps coffee shops serve French press or pour over coffee, as well as a number of specialty espresso and coffee drinks. My favorite is the cold jar, espresso shaken in a Mason jar with ice and brown sugar, finished with a little milk. (Yes, a Mason jar. No, you aren’t required to be wearing flannel to order it — though it does help you blend in.) Little Amps became #hbgfamous when Alton Brown of the Food Network stopped in for a Cortado and tweeted that it was the best he’d had on his tour. You’ll find the Cortado, half espresso and half steamed milk, on the Little Amps menu.

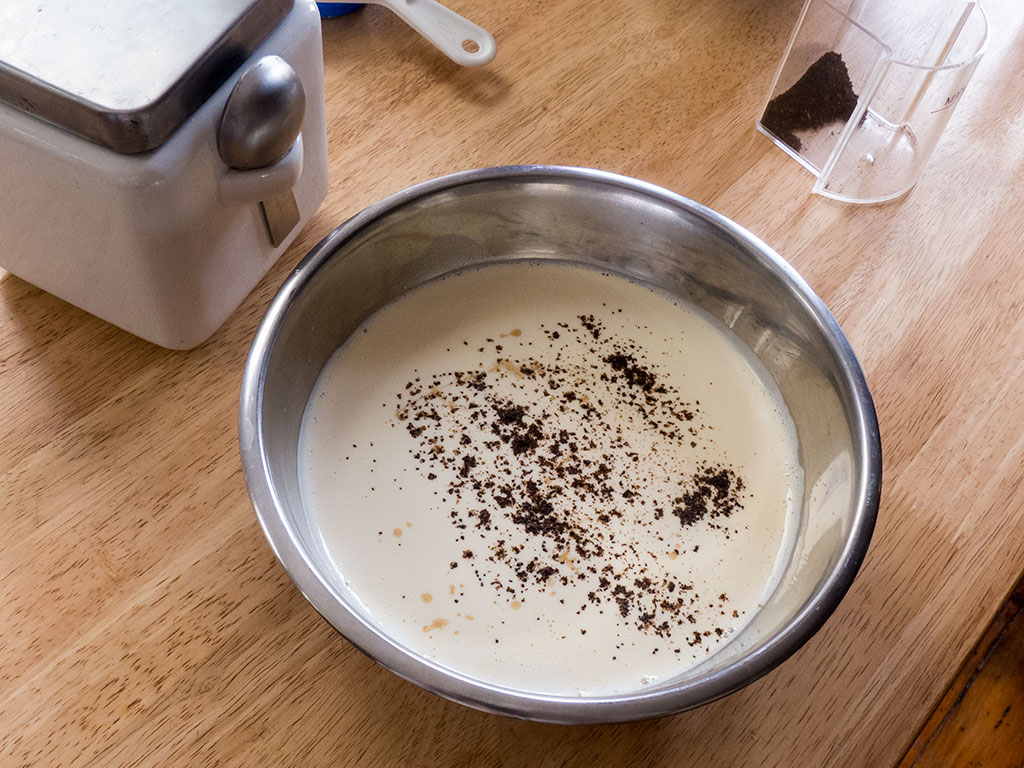
Steep the coffee beans in warm milk to get the perfect level of coffee flavor
For this coffee ice cream, I use my basic ice cream process but start with steeping the whole coffee beans in the milk used to make the ice cream. This infuses the ice cream with a lovely but not too intense coffee flavor. Then a little bit of ground coffee is added at the end to round out the flavor. This technique with the steeping and the grounds is shamelessly stolen from David Lebovitz, the king of ice cream.
My basic ice cream process pulls a few different specific steps together that are not always used together in ice cream recipes. I do this because I generally try to make my ice cream a little lighter than full fat ice creams. When you use lower fat milks in place of whole milk and heavy cream, the texture of the frozen finished product can be a little icy. This combination of techniques helps address that. My recipe uses 3 egg yolks, half and half and some 2% milk compared to Lebovitz’s 5 egg yolks, heavy cream and whole milk.
A little coffee grounds and vanilla at the end finish up the custard mix.
That being said, every now and then you just have to make full-fat ice cream and this process still holds up. I won’t judge.
Lissa’s Light(er) Ice Cream Techniques Explained:
- Beating the yolks and sugar. Instead of just adding the sugar to the milk like most recipes, beat the sugar and egg yolks together till they are pale and thick. This is a time when the muscle of a stand mixer will come in handy. I have trouble beating the yolks to the right consistency when I do it by hand, and even a hand mixer will take a while. My Kitchenaid handles this in just a few minutes.
- Temper the egg yolks. This one is tricky. I have definitely ruined a few batches of ice cream on this step. You need to gently warm the eggs without cooking them. You do this by gradually adding warmed milk to the egg/sugar mix while whisking constantly. If you mess this part up, you’ll get scrambled eggs instead of ice cream. Just take your time and err on the side adding small amounts of warmed milk at a time. And even if you don’t think you mess it up, always strain your ice cream just in case. It isn’t unusual for a few chunks of egg to sneak in.
- Heat to thicken. You want to gently heat your mixture of milk and eggs until it thickens enough to coat a spatula. Wooden spoon works great for this part — you know it’s ready when you can run your finger through the coating of custard and the track from your finger stays put on the spoon.
- Ice it down. You want to chill your custard mixture fairly quickly by using an ice bath.
- I always chill my custard overnight in the fridge before churning. Some recipes leave out this step, and you certainly can, but particularly when using lower fat ingredients it helps to produce a creamier textured ice cream. Something about fat globules or some such science.
Little Amps Coffee Ice Cream
Ingredients
- 1 1/3 c. 2% milk
- 1 1/2 c. whole espresso or coffee beans
- Pinch salt
- 3/4 c. sugar
- 3 large egg yolks
- 2 c. half and half
- 1/4 tsp. vanilla extract
- 1/4 tsp. fresh ground espresso or coffee
Instructions
- Combine milk, coffee beans, salt and 1 c. of the half and half in a sauce pan and warm over medium low heat.
- Remove from heat when the milk mixture begins to steam, but don't let it come to a simmer.
- Cover and let steep for 1 hour.
- Pour the remaining 1 c. half and half into a large bowl, and place a strainer on top. Set aside.
- Rewarm milk and coffee mixture, again to a steam but not a simmer.
- Combine sugar and egg yolks in the bowl of a stand mixer. Beat at high speed until thick and pale yellow (a few minutes in my KitchenAid)
- Temper egg yolks by gradually adding the warmed milk mixture to the eggs and sugar while stirring with a whisk. Add about half of the warm milk total, then return tempered eggs and milk to the saucepan.
- Continue to heat over medium heat. Stir gently until the mixture thickens to the point where it coats a spatula or wooden spoon (around 160 degrees).
- Pour mixture through the strainer into the half and half. Press on the coffee beans to get as much of the custard as possible out of them.
- Mix in the vanilla and ground coffee.
- Cool custard in an ice bath.
- Transfer custard to a close-able container and refrigerate overnight.
- The next day, churn the custard according to your ice cream makers instructions.
3.1
http://madefrompa.com/little-amps-coffee-ice-cream/
Apr 3, 2015 | Cuisine, Main Dishes |
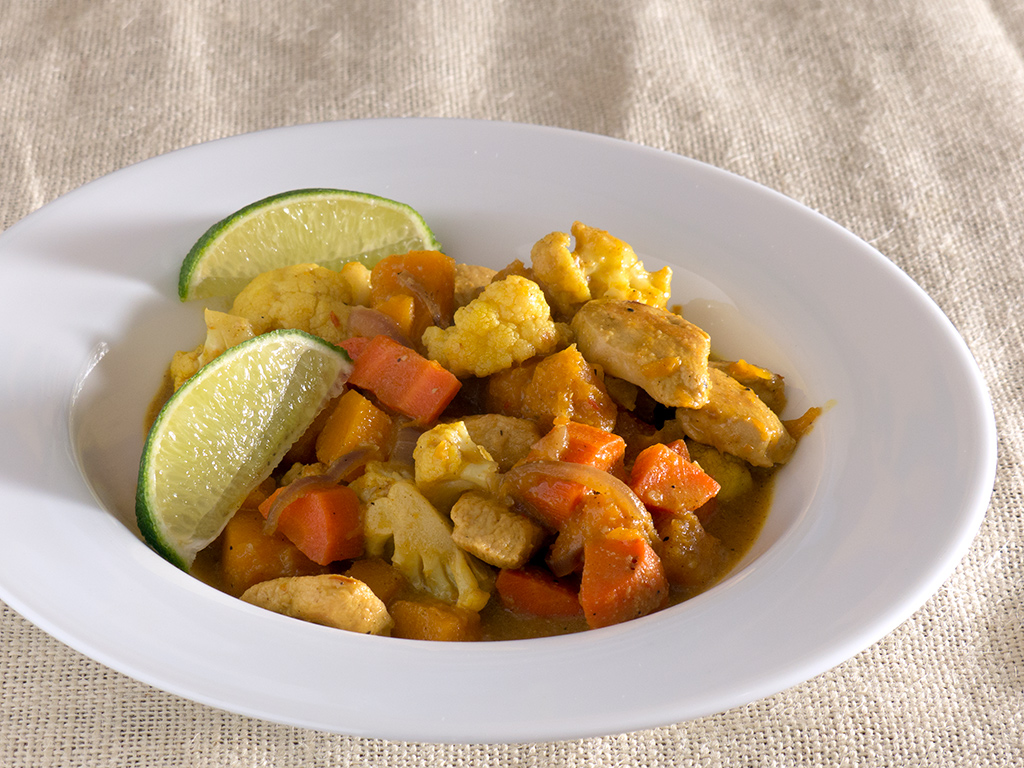
Chicken and vegetables simmered in a spicy Torchbearer curry sauce
My first blog post here was a Berbere-rubbed chicken. Spicy. A little exotic. Delicious. You probably got the idea that I like hot foods. I might even boast about it every now and again. Or, well…I may boast about it a lot. “I get my drunken noodles ‘thai hot.’” “I grow my own habaneros.” You get the idea.
The first time I tried a TorchBearer hot sauce, I was put definitively in my place. I unwittingly dove right into the deep end with their Zombie Apocalypse sauce, made from ghost chili and habanero peppers. You might assume that the name of the sauce would have clued me in, but no. I doused my tacos with a liberal helping and scarfed down the first taco and a half before I got a hint of what I was in for.
Kids – TorchBearer’s hot sauces are NOT messing around.
In my defense, most of the TorchBearer labels feature a rating front and center that lets you know if what you’re trying is “sweet,” “mild” or in the case of their Rapture sauce, “deadly.” Zombie Apocalypse features no such rating. I figured I could handle it, but the subsequent tears and gulped glasses of milk were proof I had no idea what I was getting myself into.
Let me introduce TorchBearer Sauces. Vid, Ben and Tim started the central PA-based company 10 years ago this week (Happy Birthday, guys!). It is truly a local endeavor – the three founders are locals, the labels are designed by local designer Hauck Interactive, and their wares are hawked by many central PA friends, including local celebrities and bloggers Sara and Tierney.

This recipe winds up spicy, but you can easily adjust the heat by adding less curry sauce
TorchBearer started when the boys had an excess of habaneros and decided to make a habanero preserve. I get that. I grow habaneros every summer, and often wonder what to do when I suddenly have 20 ripe habaneros on my hands. (This summer I’ll share a sweet habanero hot sauce recipe that is amazing on fish tacos.)
After realizing they had an amazing creation on their hands, the boys decided to go for it. They perfected their sauce, set out for their first hot sauce festival, and took home three national awards.
Now 10 years later they have over 20 products, ranging from mild but garlicy fan favorite Oh My Garlic!, to spicy wing sauces and salsas, to super, incredibly-mouth-blisteringly-hot sauces made with Ghost Chili and Trinidad Scorpion peppers. Their hottest is the aforementioned Rapture, which according to the boys is the hottest natural hot sauce in the world. I have to admit, I haven’t tried that one, not even a little drop.
TorchBearer focuses on natural ingredients in their recipes, which I love. Carrots and mandarin oranges add such a nice flavor along with their sweetness that you’ll never get from corn syrup.
Since choking on that Zombie Apocalypse, I’ve come a long way with TorchBearer. My fridge is currently home to 7 mostly used bottles of different Torch sauces. One of their newest is the Psycho Curry. When I first tried it, the Psycho Curry was so new it was still in “test sauce” status (so no fancy label). According to some inside information I got today, the sauce now has the green light and is on its way to amazing hand-drawn label status.
I couldn’t agree with that decision more. The curry sauce is really outstanding. It’s hot (made with habaneros), but when dealt with correctly—not overwhelmingly so. The flavor is very bold, from the lime, fenugreek, turmeric and other spices. Overall, I think it is a good sauce to mix in with something that will mellow it out (I picked coconut milk). But if you are courageous, try it on its own. Friend-of-the-blog Sara Bozich over at SaraBozich.com made a version using the sauce straight, more like a stir-fry sauce, and she and her husband loved it.

The fall vegetables work great, but summer veggies like yellow squash and peppers would be delicious too
When I first picked up the sauce, I did a little sampling of it by itself to get to know it. Like I said, it’s got a bold profile. And it isn’t a sweet curry. I wanted to put together a recipe that would tame the sauce just a little bit, but still let it shine. I picked carrot and butternut squash to bring some sweetness to the recipe; I decided at the end it still needed a little bit of brown sugar to sweeten it up a little more. And since I’ve been on a kick of using cauliflower instead of rice, I threw in some of that as well.
This recipe would work great without any meat; the veggies themselves are hearty and filling. And actually, that would make it vegan. But my husband doesn’t eat any meals without meat, so I added chicken.
You could adapt this recipe to almost any veggie and protein combo. I’ve tried this adding either snow peas or asparagus, and both were great – just watch the cooking time. Snow peas I added just a few minutes before finishing. Asparagus was a little longer. I think shrimp would be nice in it as well – again just add in for a few minutes at the end.
TorchBearer Curry Chicken and Veggies
Ingredients
- 2 Tbsp canola oil
- 1 chicken breast, cut into bite sized pieces and seasoned with salt and pepper
- 1/2 large red onion, thinly sliced
- 1 cup cubed carrot (3 medium carrots)
- 2 cups cubed butternut squash
- 3 cups cauliflower florets
- 1 14 oz. can coconut milk (lite or regular)
- 1/2 cup Torchbearer Psycho Curry sauce
- 1 tsp brown sugar
Instructions
- Heat 1 Tbsp of canola oil in a skillet over medium heat
- Stir fry the chicken pieces until brown, about 5 minutes
- Remove chicken from heat and set aside
- While chicken is cooking, whisk together the can of coconut milk, curry sauce and brown sugar
- Heat the remaining 1 Tbsp of canola oil in a large skillet
- Add red onion to oil and cook, stirring occasionally, until soft - about 5 minutes
- Add carrot and squash, cook 5 minutes, stirring occasionally
- Add cauliflower and browned chicken, cook 5 minutes, stirring occasionally
- Add curry coconut milk mixture to veggies and chicken
- Bring to a simmer. Turn down heat to keep at a simmer
- Simmer 20-40 minutes, depending on desired consistency and liquidity. I liked my curry softer with less liquid, so let it go pretty long
3.1
http://madefrompa.com/torchbearer-curry-chicken-and-veggies/
Mar 1, 2015 | Cuisine, Main Dishes |
Guys, if we’re going to be friends, there’s something you need to know. A few things, probably, like my tendency to interrupt myself, but we’ll start with this: I’m a locavore, and I like to eat organic when I can.
I know, right? Ugh.
You can’t be all that surprised about the local part. This blog is called Made from PA. And the organic part…well, I’ve just read a little too much about the food industry.
But but BUT — I swear to you I’ll try not to be preachy about it. Or at least, I’ll try to tone down the preach to non-denominational levels. I’ll just judge you quietly instead.

Berbere roast chicken with Misr Wat, an Ethiopian lentil dish
Given my local, organic tendencies, it was easy for me to decide what ingredient to feature first here at Made from PA. A whole roast chicken from my meat CSA, North Mountain Pastures. North Mountain is a perfect example of why I feel so lucky to live where I do, with easy access to one of the only meat CSAs that I’m aware of.
(A quick aside for my friends who aren’t familiar with the whole Community Supported Agriculture thing: check out the info at www.localharvest.org, then sign up for one before spring. If you live by me, sign up for Piney Mountain Orchard. You’ll love it, I promise.)
North Mountain Pastures is an 84-acre farm run by a couple, Brooks and Anna, just outside Newport, PA. I adore them. The chickens, cows, pigs and sheep they raise are grass-fed and have permanent access to pastures. I will keep my soap boxing short, but I really enjoy knowing that the majority of the meat cooked in my house is from animals that were raised in a way where they could act naturally, weren’t pumped full of antibiotics and hormones, and were killed humanely when it was time for slaughter.
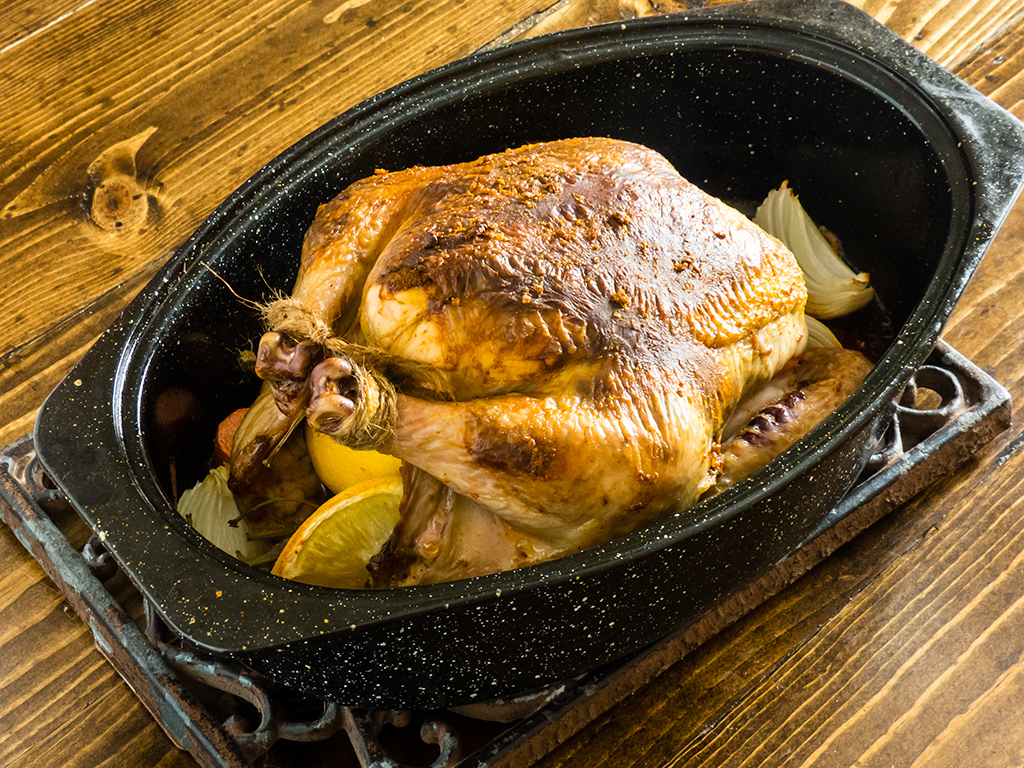
The Berbere rub leads to a nice dark skin on the roast chicken.
Even more than that, I love personally knowing the farmers that are raising the meat I eat. When I pick up my 12 pound mix of beef, chicken, pork and lamb once a month, it’s usually Anna handing it to me. I’ve even had Brooks occasionally apologize that our meat wasn’t frozen yet because it was just butchered that morning. I mean…really? How cool is that?! (Other than being kind of gross if I think about it too hard, so let’s not do that.)
Starting this blog with something from North Mountain was obvious. I’m pretty well smitten with them. (The fact that Brooks is totally cute has nothing to do with that, I swear.) Chicken was obvious, as well. We eat a variety of meats in my house, but I gotta be honest – we eat a LOT of chicken. Every month, we get at least one whole chicken from North Mountain, so there we go.
Doing Ethiopian Berbere roast chicken? Not much reason to that other than that I’d just picked up a new jar of Berbere spice from Penzeys, and figured it would be fun to roast a chicken with a rub including the Berbere. I was right. Spicy and tasty without hiding the good chicken flavor.

Berbere, ginger, garlic and butter go into the rub.
After I decided on Berbere, I went on a trip to my local farmer’s market where I scored some purple carrots, some ingredients to make Misr Wat, and I was all set. Misr Wat is an Ethiopian lentil dish, and I’ll have the recipe for that posted soon.
I picked up the purple carrots because they seemed pretty nifty, and I’d never cooked with them before. The joys of a local farmer’s market! Don’t worry, you can use regular carrots if you can’t find purple ones.
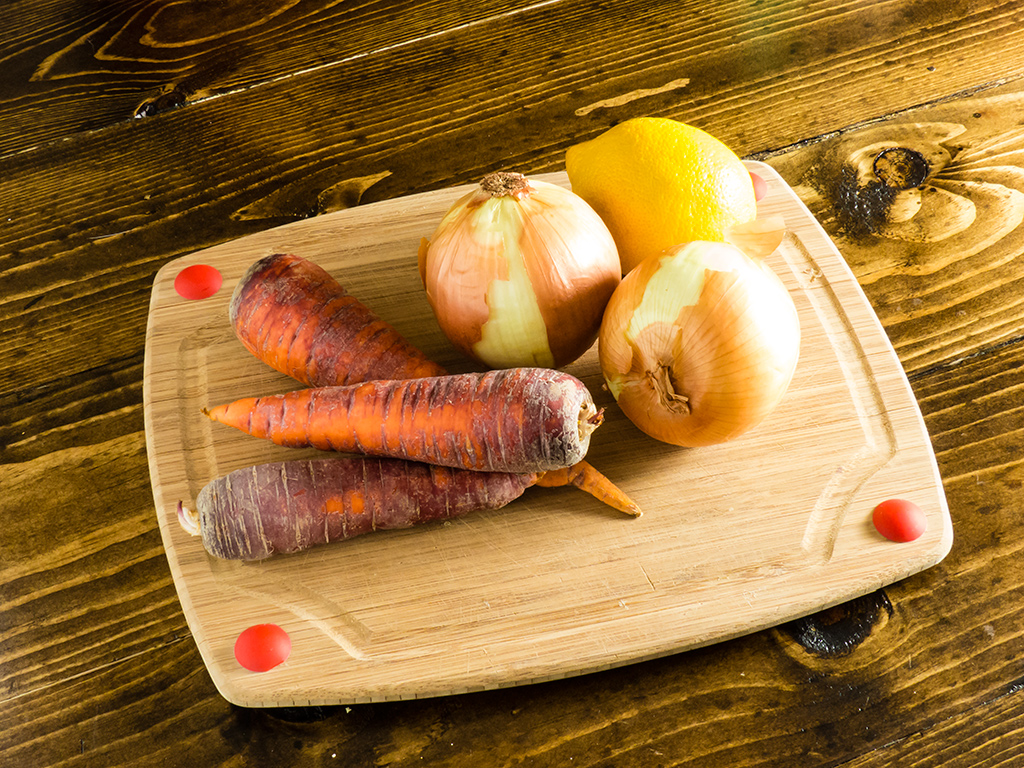
Purple carrots are fun, but using regular carrots will work fine too.
One final thing — Berbere is HOT. Particularly the Berbere seasoning I used from Pensey’s. If you don’t like heat, reduce the amount of Berbere in the rub.
Let’s get cooking!
Not your average roast chicken! A spicy and exotic roast chicken using Berbere seasoning, an Ethiopian spice mixture containing cayenne, fenugreek, cardamom and more.
Ingredients
- 1 small whole chicken (about 3 lbs.), rinsed and patted dry
- 2 cloves garlic, minced
- 1" piece of ginger, minced or grated
- 2 tablespoons Berbere seasoning*
- 1/2 teaspoon salt
- 2 tablespoons unsalted butter, softened
- 1 lemon, quartered
- 1 bunch cilantro
- 2 small onions, quartered
- 2 large purple carrots, peeled and cut into 1" chunks (use 3 orange carrots if you can't find purple)
-
- *Berbere is hot, so feel free to use less if you don't like a lot of heat
Instructions
- Preheat oven to 425 degrees.
- In a small bowl, combine garlic, ginger, Berbere, salt and butter to form a paste.
- Use your fingers to gently separate the skin from the meat of the chicken (aim for breasts, legs, and thighs). Again using your fingers, rub seasoning paste under the skin, getting the meat good and covered. Rub any extra paste over the chicken skin or inside the cavity.
- Place the lemon quarters and the bunch of cilantro inside the chicken's cavity. Fold the chicken's wings up and over its shoulders, tucking the wing tips beneath the back, and tie the legs together at their ends. Or do whatever fancy truss technique you prefer.
- Place onion quarters and carrot pieces into the bottom of a roasting pan. Place chicken, breast-side up, over onion and carrot.
- Put your chicken in the oven and roast at 425 degrees for 20 minutes. After 20 minutes, lower the heat to 300 degrees and roast another 40-50 minutes until your chicken's skin is golden and the thigh meat has reached a temperature of 165 degrees.
- Remove from oven and let rest for 10 minutes before carving.
3.1
http://madefrompa.com/berbereroastchicken/